Javafx布局
JavaFX布局
(一)FlowPane面板
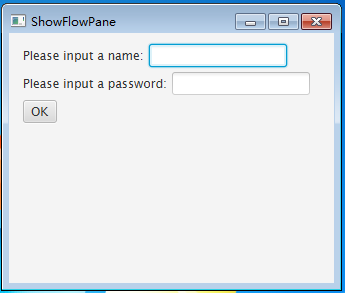
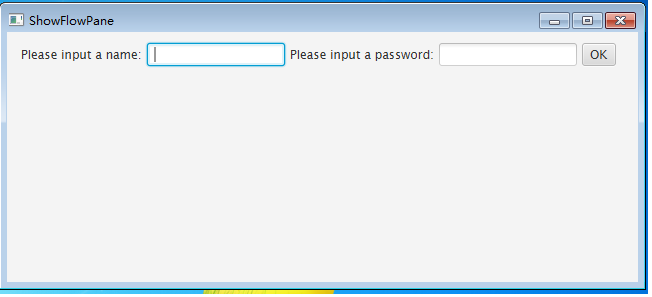
按照从上到下、从左到右的次序摆放,面板大小变化,会重新摆放各个控件的位置
首先创建一个FlowPane对象,代码如下:
FlowPane pane = new FlowPane();
pane.setPadding(new Insets(11, 12, 13, 14));

pane.setHgap(5);//设置控件之间的垂直间隔距离

pane.setVgap(5);//设置控件之间的水平间隔距离
创建两个标签对象、两个文本输入框和一个按钮对象,代码如下:
Label lbName = new Label(“Please input a name:”);
TextField tfName = new TextField();

Label lbPassword = new Label("Please input a password:");

TextField tfPassword = new TextField();

Button okbtn = new Button("OK");
将这几个控件添加到面板中,代码如下:
pane.getChildren().addAll(lbName,tfName,lbPassword,tfPassword,okbtn);
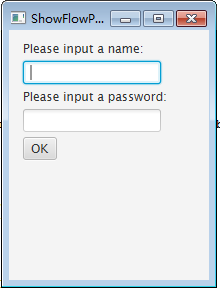
当面板大小发生变化时
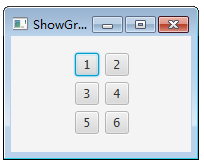
(二) GridPane面板
将整个面板划分为若干个格子,每个格子的大小是一样的,每个格子中可以放置一个控件
如下代码创建了一个GridPane对象:
GridPane pane = new GridPane();
pane.setAlignment(Pos.CENTER);

pane.setPadding(new Insets(11.5, 12.5, 13.5, 14.5));

pane.setHgap(5.5);

pane.setVgap(5.5);
向面板中添加六个按钮,代码如下:
pane.add(new Button(“1”), 0, 0);
pane.add(new Button("2"), 1, 0);

pane.add(new Button("3"), 0, 1);

pane.add(new Button("4"), 1, 1);

pane.add(new Button("5"), 0, 2);

pane.add(new Button("6"), 1, 2);
add方法的第二个和第三个参数是指定控件摆放的位置,分别表示所在的列和行,0是第一行和第一列。布局效果如下图所示:
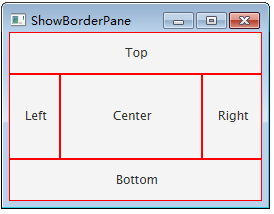
(三) BorderPane面板
将整个面板划分五个区域,分别是上、下、左、右、中,每个区域可以放置一个控件。
首先创建一个BorderPane对象,代码如下:
BorderPane pane = new BorderPane();
然后在BorderPane对象的五个区域分别放置五个CustomPane对象,CustomPane是自定义面板,是为了方便放置标签。代码如下:
pane.setTop(new CustomPane(“Top”)); //放置在上面
pane.setRight(new CustomPane("Right"));//放置在右边

pane.setBottom(new CustomPane("Bottom"));//放置在上面

pane.setLeft(new CustomPane("Left"));//放置在左边

pane.setCenter(new CustomPane("Center"));//放置在中间
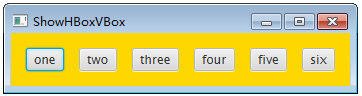
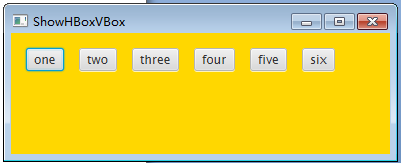
(四) HBox面板
无论有多少个控件都是放在同一行
首先创建一个HBox对象,代码如下:
HBox hBox = new HBox(15);
hBox.setPadding(new Insets(15, 15, 15, 15));

hBox.setStyle("-fx-background-color: gold");
然后,在面板上添加六个按钮,代码如下:
hBox.getChildren().add(new Button(“one”));
hBox.getChildren().add(new Button("two"));

hBox.getChildren().add(new Button("three"));

hBox.getChildren().add(new Button("four"));

hBox.getChildren().add(new Button("five"));

hBox.getChildren().add(new Button("six"));
当面板大小发生变化时
(五) VBox面板
将所有的控件放在同一列
首先创建一个VBox对象,代码如下:
VBox vBox = new VBox(15);
vBox.setPadding(new Insets(15, 5, 5, 5));然后,在VBox对象中添加六个按钮,代码如下:
vBox.getChildren().add(new Button(“one”));
vBox.getChildren().add(new Button("two"));

vBox.getChildren().add(new Button("three"));

vBox.getChildren().add(new Button("four"));

vBox.getChildren().add(new Button("five"));

vBox.getChildren().add(new Button("six"));

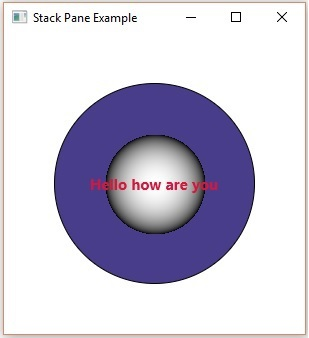
(六)StackPane
每个元素叠加在另一个元素上面
import javafx.application.Application;
import javafx.collections.ObservableList;
import javafx.geometry.Insets;

import javafx.scene.Scene;
import javafx.scene.layout.StackPane;
import javafx.scene.paint.Color;
import javafx.scene.shape.Circle;
import javafx.scene.shape.Sphere;

import javafx.scene.text.Font;
import javafx.scene.text.FontWeight;
import javafx.scene.text.Text;
import javafx.stage.Stage;

public class StackPaneExample extends Application {
   @Override
   public void start(Stage stage) {
      //Drawing a Circle
      Circle circle = new Circle(300, 135, 100);
      circle.setFill(Color.DARKSLATEBLUE);
      circle.setStroke(Color.BLACK);

      //Drawing Sphere
      Sphere sphere = new Sphere(50);

      //Creating a text
      Text text = new Text("Hello how are you");

      //Setting the font of the text
      text.setFont(Font.font(null, FontWeight.BOLD, 15));

      //Setting the color of the text
      text.setFill(Color.CRIMSON);

      //setting the position of the text
      text.setX(20);
      text.setY(50);

      //Creating a Stackpane
      StackPane stackPane = new StackPane();

      //Setting the margin for the circle
      stackPane.setMargin(circle, new Insets(50, 50, 50, 50));

      //Retrieving the observable list of the Stack Pane
      ObservableList list = stackPane.getChildren();

      //Adding all the nodes to the pane
      list.addAll(circle, sphere, text);

      //Creating a scene object
      Scene scene = new Scene(stackPane);

      //Setting title to the Stage
      stage.setTitle("Stack Pane Example");

      //Adding scene to the stage
      stage.setScene(scene);

      //Displaying the contents of the stage
      stage.show();
   }
   public static void main(String args[]){
      launch(args);
   }
}
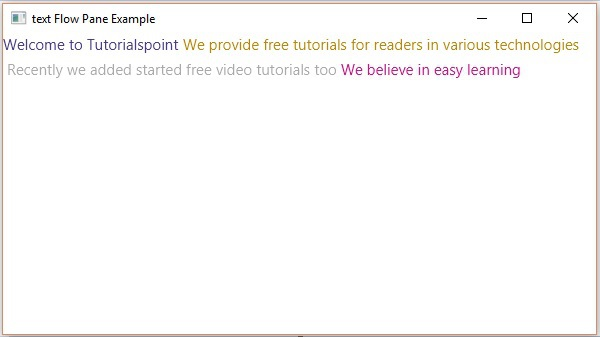
(七)Textflow
多个文本节点的流式布局
import javafx.application.Application;
import javafx.collections.ObservableList;
import javafx.scene.Scene;
import javafx.scene.paint.Color;
import javafx.scene.text.Font;
import javafx.scene.text.Text;
import javafx.scene.text.TextAlignment;
import javafx.scene.text.TextFlow;
import javafx.stage.Stage;

public class TextFlowExample extends Application {
   @Override
   public void start(Stage stage) {
      //Creating text objects
      Text text1 = new Text("Welcome to Tutorialspoint ");

      //Setting font to the text
      text1.setFont(new Font(15));

      //Setting color to the text
      text1.setFill(Color.DARKSLATEBLUE);

      Text text2 = new Text("We provide free tutorials for readers in
      various technologies  ");

      //Setting font to the text
      text2.setFont(new Font(15));

      //Setting color to the text
      text2.setFill(Color.DARKGOLDENROD);
      Text text3 = new Text("\n Recently we started free video tutorials too ");

      //Setting font to the text
      text3.setFont(new Font(15));

      //Setting color to the text
      text3.setFill(Color.DARKGRAY);

      Text text4 = new Text("We believe in easy learning");

      //Setting font to the text
      text4.setFont(new Font(15));
      text4.setFill(Color.MEDIUMVIOLETRED);

      //Creating the text flow plane
      TextFlow textFlowPane = new TextFlow();

      //Setting the line spacing between the text objects
      textFlowPane.setTextAlignment(TextAlignment.JUSTIFY);

      //Setting the width
      textFlowPane.setPrefSize(600, 300);

      //Setting the line spacing
      textFlowPane.setLineSpacing(5.0);

      //Retrieving the observable list of the TextFlow Pane
      ObservableList list = textFlowPane.getChildren();

      //Adding cylinder to the pane
      list.addAll(text1, text2, text3, text4);

      //Creating a scene object
      Scene scene = new Scene(textFlowPane);

      //Setting title to the Stage
      stage.setTitle("text Flow Pane Example");

      //Adding scene to the stage
      stage.setScene(scene);

      //Displaying the contents of the stage
      stage.show();
   }
   public static void main(String args[]){
      launch(args);
   }
}
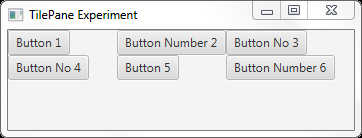
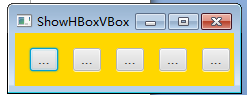
(八)TilePane
TilePane是一个类似于FlowPane的容器。 但是它与FlowPane不同,因为子组件列在相同大小的单元格上。
package com.jenkov.javafx.layouts;

import javafx.application.Application;
import javafx.geometry.Pos;
import javafx.scene.Scene;
import javafx.scene.control.Button;
import javafx.scene.layout.TilePane;
import javafx.stage.Stage;


public class TilePaneExperiments extends Application  {


    @Override
    public void start(Stage primaryStage) throws Exception {
        primaryStage.setTitle("TilePane Experiment");

        Button button1 = new Button("Button 1");
        Button button2 = new Button("Button Number 2");
        Button button3 = new Button("Button No 3");
        Button button4 = new Button("Button No 4");
        Button button5 = new Button("Button 5");
        Button button6 = new Button("Button Number 6");

        TilePane tilePane = new TilePane();

        tilePane.getChildren().add(button1);
        tilePane.getChildren().add(button2);
        tilePane.getChildren().add(button3);
        tilePane.getChildren().add(button4);
        tilePane.getChildren().add(button5);
        tilePane.getChildren().add(button6);

        tilePane.setTileAlignment(Pos.TOP_LEFT);

        Scene scene = new Scene(tilePane, 200, 100);
        primaryStage.setScene(scene);
        primaryStage.show();
    }

    public static void main(String[] args) {
        Application.launch(args);
    }
}